Pipe Straightness Gages
Gagemaker manufactures gaging equipment for the inspection of tubular goods (the pipes) before or after they are threaded. Many are listed below, but we also offer custom and non-stock/special items. For more information on custom or non-stock items, please contact customer service.
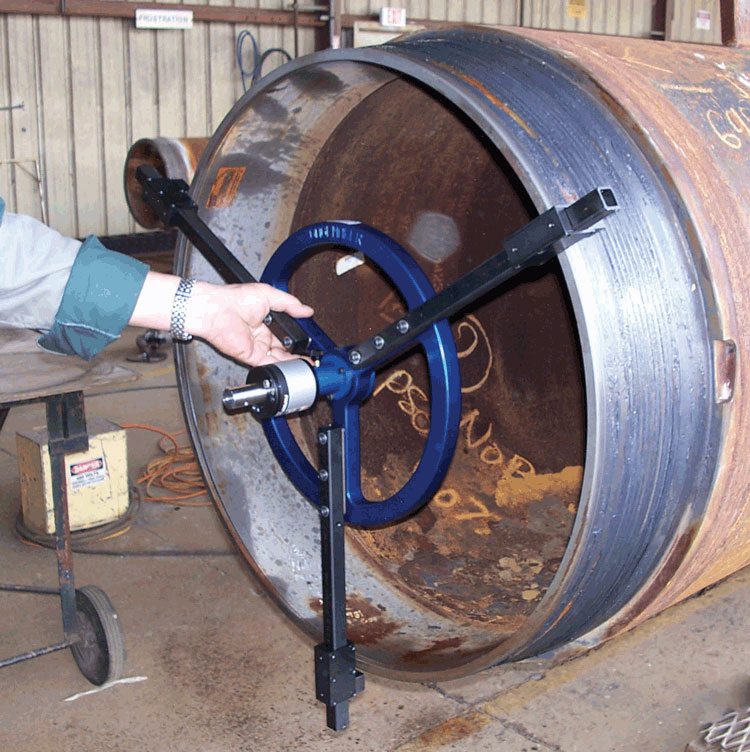
Angular and Parallel Alignment
The Laser Alignment Gage ensures proper angular and parallel alignment during assembly of weld-on connectors. Replacement parts are available.
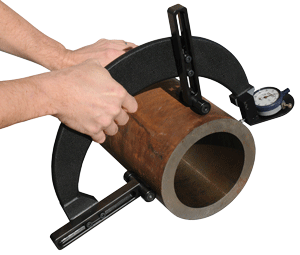
Ovality
Ovality gages are designed to check the out-of-round condition of tubular goods prior to processing. Gagemaker’s OV-9800 series offers diameter adjustability within a size range. Stabilizing rollers are adjustable for diameter as well as for alignment to the centerline.
| Range | Description | Model | Quote | |
|---|---|---|---|---|
| 2″ – 6″ (50.8 – 152.4 mm) | Ovality Gage | OV-9801 | Get Quote | |
| 6″ – 10″ (152.4 – 254 mm) | Ovality Gage | OV-9802 | ||
| 10″ – 14″ (254 – 355.6 mm) | Ovality Gage | OV-9803 |
Pipe Hook or Bend
The Saddle Gage measures the amount of hook or bend at the end of a joint of pipe.
The SG-8001 uses the RC-375 roller contact.
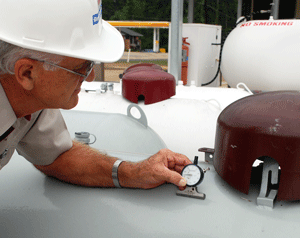
Pit Depth
The PD-3000 series of gages inspect the depth of surface pitting on tubular goods. The gage also accepts other types and sizes of contact points for use in other applications, such as groove and thread depth inspection.
Select the PD-3000 gage model based on the type of indicator required.
Select the PD-3000 gage model based on the type of indicator required.
| Range | Base | Description | Model |
|---|---|---|---|
| .250″ (6.35 mm) | Standard | Pit Depth Gage, AGD #1, 0-100 | PD-3003 |
| .450″ (11.43 mm) | Standard | Pit Depth Gage, AGD #2, 0-100 | PD-3004 |
| .450″ (11.43 mm) | Flat Base | Pit Depth Gage, AGD #2, 0-100 | PD-3005 |
| .450″ (11.43 mm) | 6″ Long Flat Base | Pit Depth Gage, AGD #2, 0-100 | PD-3006 |
| .450″ (11.43 mm) | 6″ Long V Base | Pit Depth Gage, AGD #2, 0-100 | PD-3007 |
| Base | Length | Description | Model |
|---|---|---|---|
| Flat | – | Pit Depth Flat Base | PD-3000BF |
| Flat | 6″ (152.4 mm) |
Pit Depth Flat Base, 6″ | PD-3000BF-6 |
| Flat | 10″ (254 mm) |
Pit Depth Flat Base, 10″ | PD-3000BF-10 |
| V | – | Pit Depth V Base | PD-3000BV |
| V | 6″ (152.4 mm) |
Pit Depth V Base, 6″ | PD-3000BV-6 |
Squareness
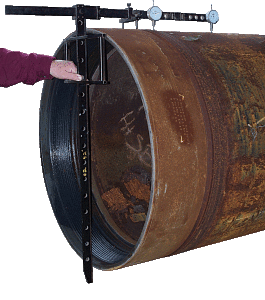
The SQ-1600 Squareness gage monitors the alignment of weld-on connectors to the pipe body.
Squareness gages require setting by a qualified standard. The SQ-1630S, our precision calibration square, is strongly recommended for best results. Standard sold separately.
| Maximum Diameter | Reach | Description | Model |
|---|---|---|---|
| 30” (762 mm) | 30” (762 mm) | Squareness Gage | SQ-1630 |
| 36” (914.4 mm) | 30” (762 mm) | Squareness Gage | SQ-1636 |
| 48” (1219.2 mm) | 30” (762 mm) | Squareness Gage | SQ-1648 |
| – | – | Squareness Gage Standard, 14” X 36” (355.6 x 914.4 mm) Square | SQ-1636S |
| – | – | Main “H” bar only for the SQ-1630 | SQ-1630HB |
| – | – | Main “H” bar only for the SQ-1636 | SQ-1636HB |
| – | – | Squareness Gage pt slider | SQ-PT-SLIDE |
Straightness
The SE-1000 Straight Edge gage measures the straightness of well tubing and casing. The gage price includes an SES-1000 Standard. Replacement standards are available.
